Coding
I've been studying computer programming for over two years, in which time I have learnt Python, C, JavaScript/HTML/CSS, and SQL. I have completed Harvard's CS50 and CS50P courses, and am currently working on an online computer science degree.
I'm really passionate about coding and I absolutely love learning new things and making programs!
Portfolio
Mega Tic-Tac-Toe

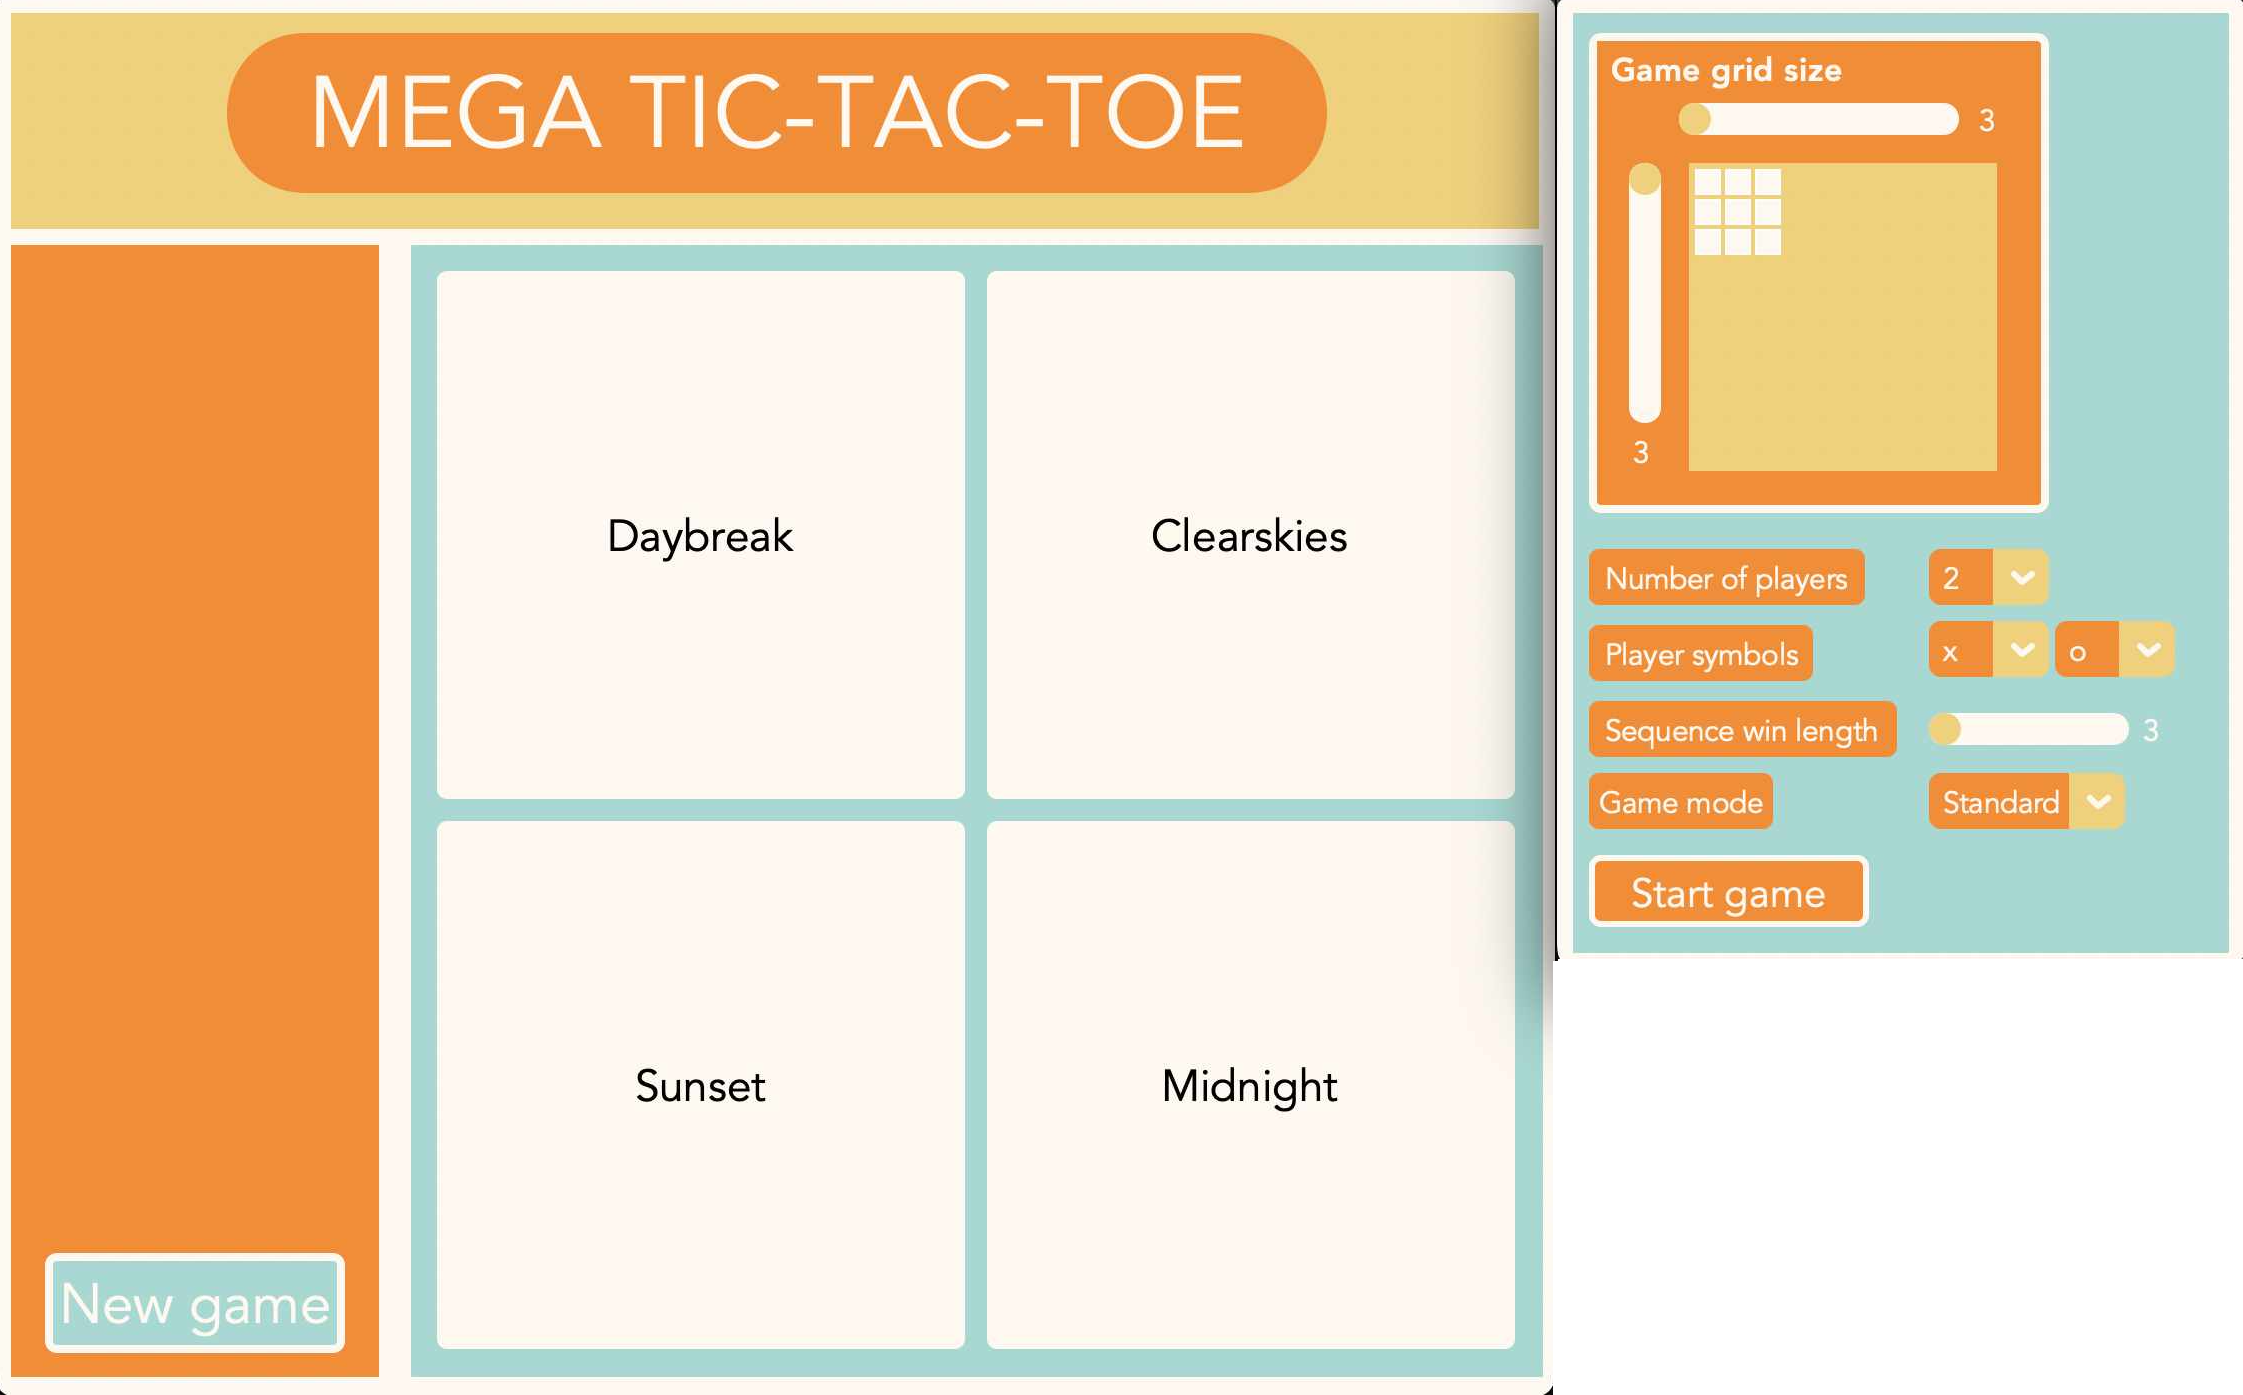
My first big project was Mega Tic-Tac-Toe — a chaotic twist on the classic game of tic-tac-toe (also known as noughts and crosses for the Brits out there!). I learnt so much in the process of this project, including creating graphical user interfaces in Python with Tkinter, object-oriented programming, and game design!

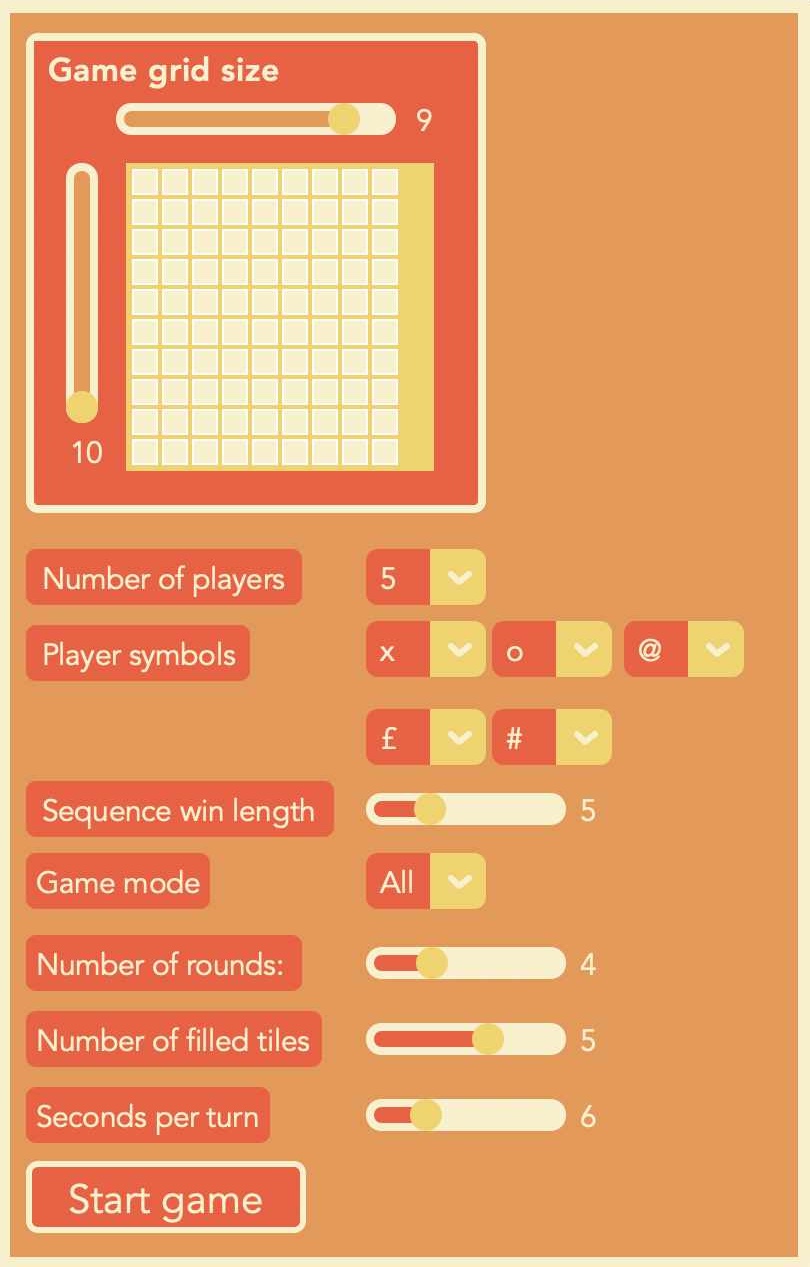
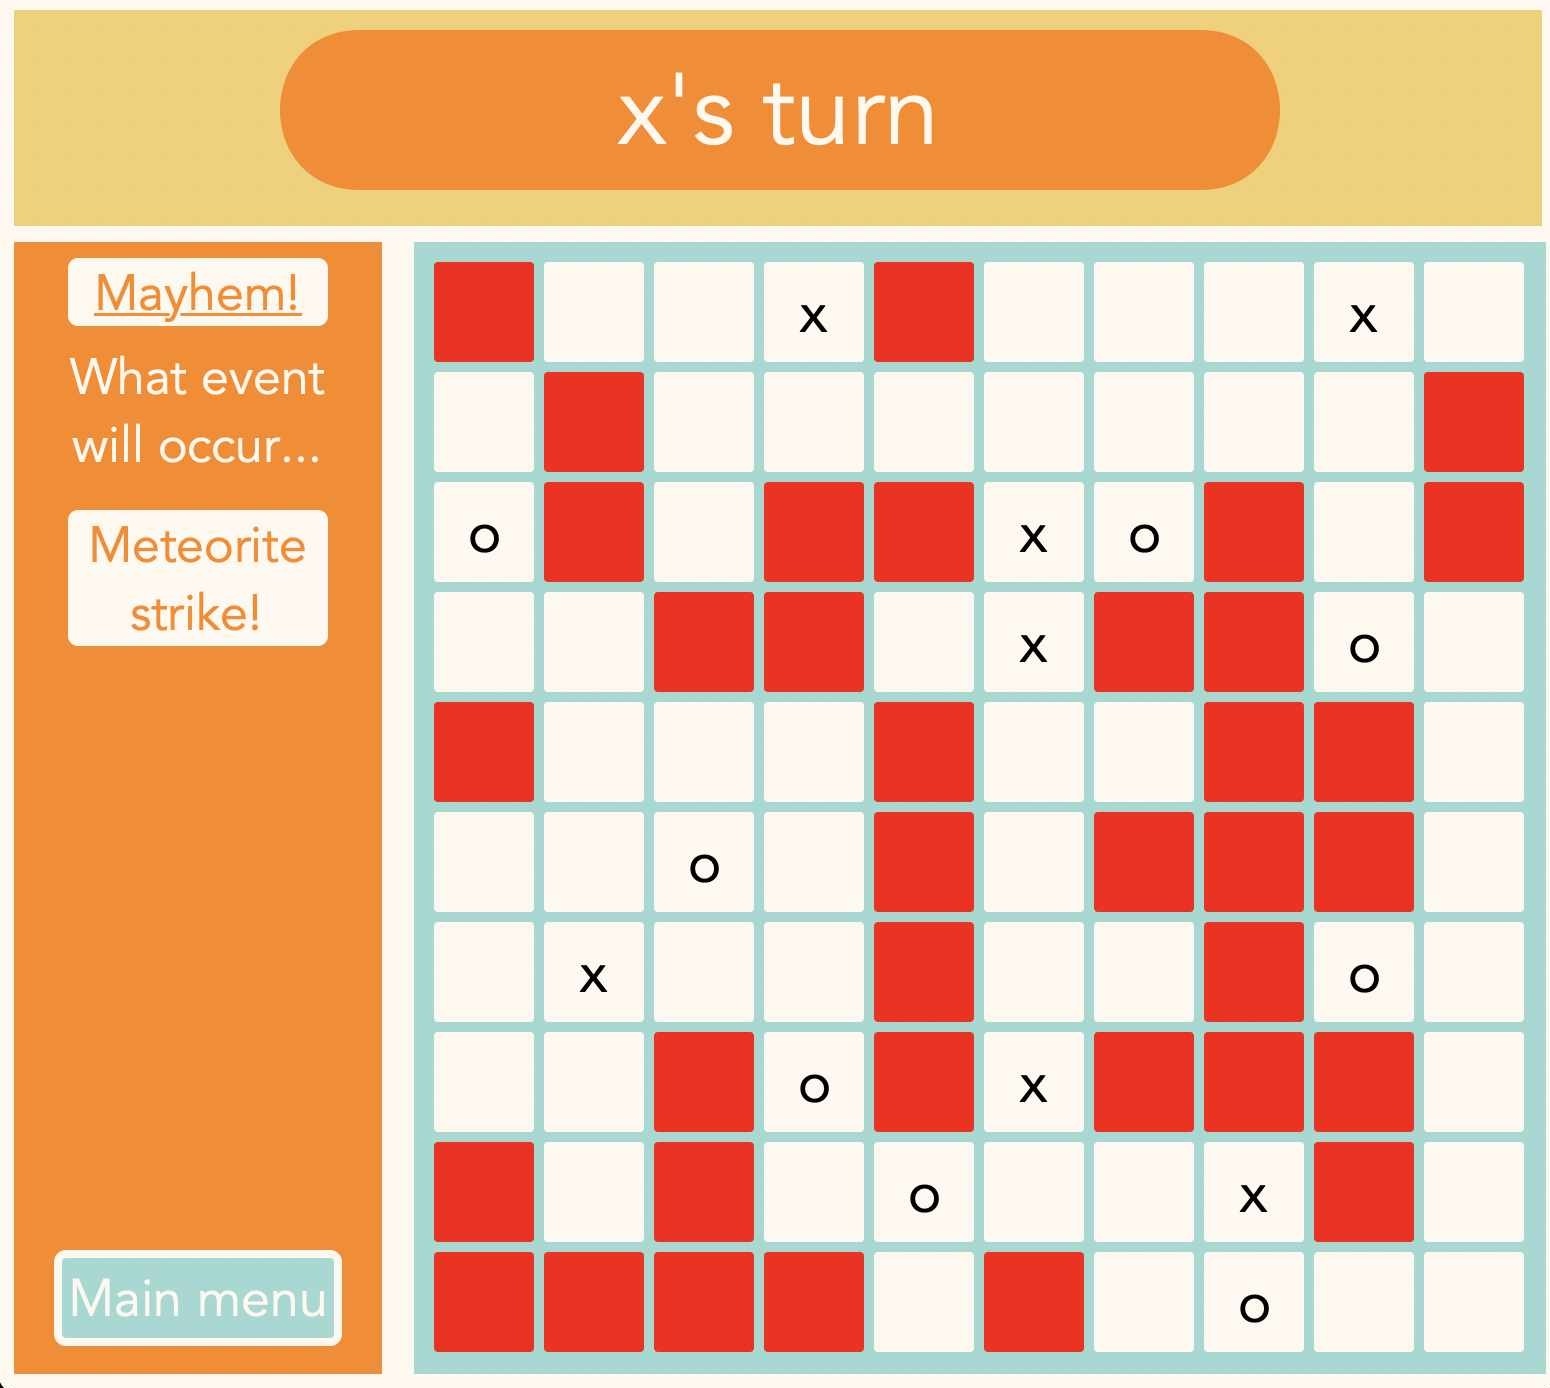
The game was fully customisable — allowing players to choose the grid size (from 3x3 to 10x10!), colour theme, number of players (from 2 to 12), the players symbols (hence why I couldn't call it "noughts and crosses"!), the sequence win length, and the game mode. The game modes were: 'standard', 'rounds' (which lets users choose how many rounds of the game to play, in a 'best-of-x' style), 'pick-up' game (which starts with some of the grid cells already filled in), 'timed' (which gives players a set amount of time to tiles their move), 'all' (which combines all of the features above), and finally, 'mayhem' mode.

In mayhem mode random events occur such as: 'meteorite strike' which empties a random amount of tiles, 'lottery', which gives a random player an additional random filled in tile, 'sabotage' which lets a player remove another player's symbol from the grid, and 'switch' which swaps all players symbols with another players. And of course, most of the game modes allow customisation too — for example, in timed mode you choose how many seconds are given for each turn.
This website
I coded this whole website using HTML, CSS, JavaScript, and Python! When I started this project, I barely knew anything about web development, but I very quickly fell in love with it.

First I learnt all about HTML and the importance of semantic markup to increase accessibility and organisation.
Then I leant about CSS, which also gave me the foundational knowledge for QSS which I would end up using in later projects (see below!). As you can probably tell, I used CSS extensively to style this website, as well as to make aspects of the style interactive — I learnt how to make CSS animations, and how to use media queries to apply different rule sets based on the screen dimensions (i.e, making the website design change for mobile devices).
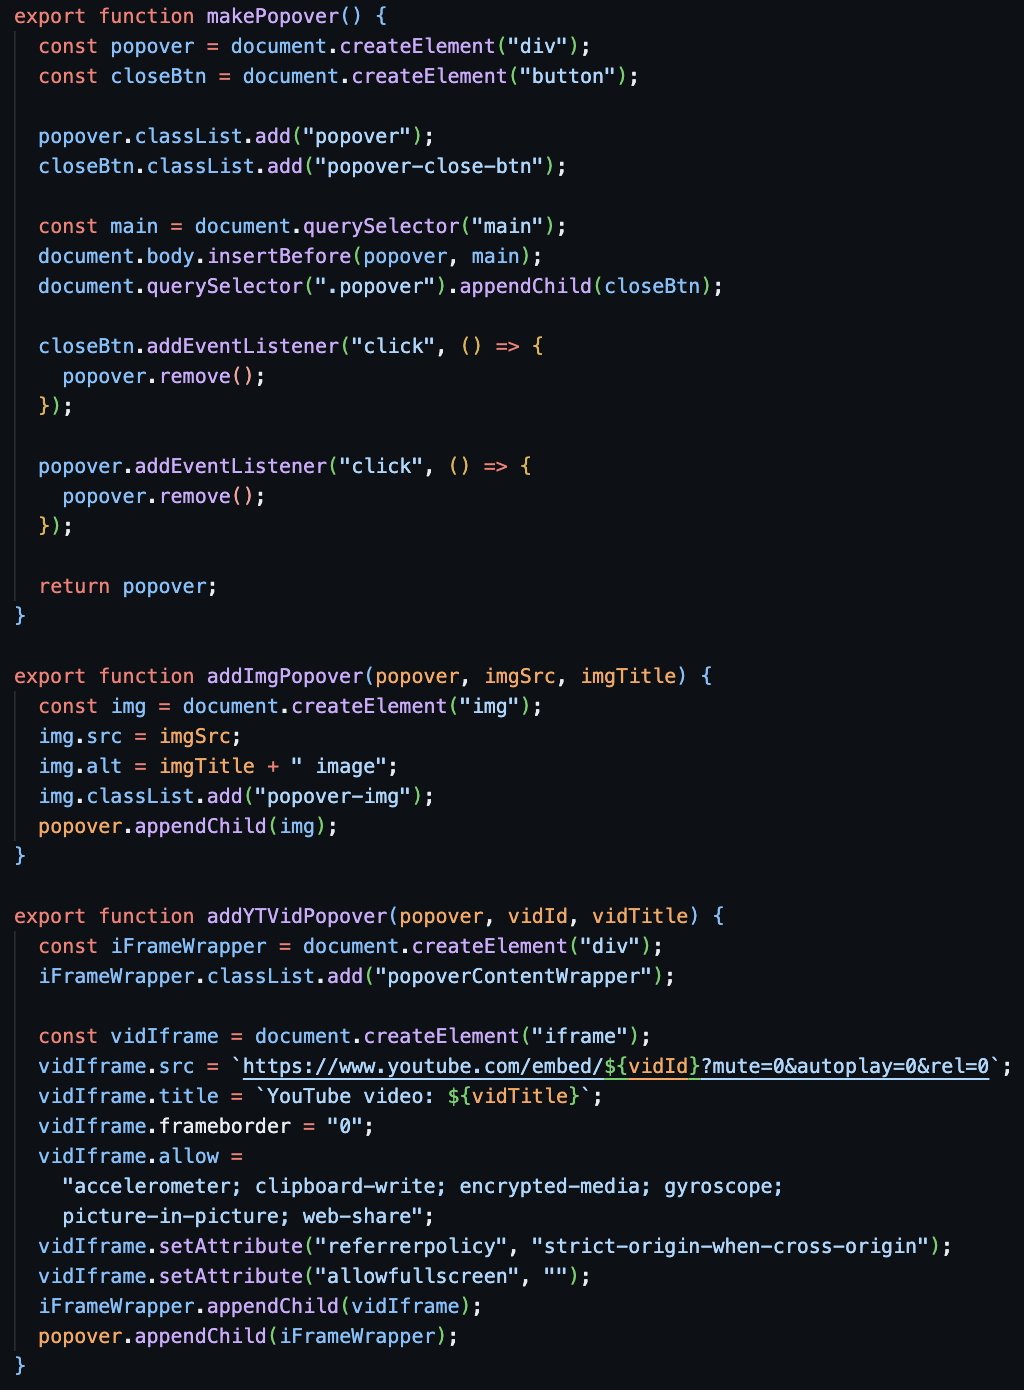
After that, I learnt JavaScript. This allowed me to add all sorts of cool functionality to the website, such as popovers when a user clicks on a gallery image. One of the applications I'm most proud of is connecting my website to the YouTube API to dynamically retrieve my YouTube uploads and build the editing page procedurally from the response! I took a similar dynamic-HTML-generation approach for much of this site; this is hugely powerful as it means that I don't have anything hard-coded, so I can easily update the pages, simply by adding to the directories my scripts retrieve their data from!
I also used Flask to serve the pages, allowing me to extract repeated code (such as the header), create a functional contact page, and allowing me to use Jinja to dynamically add content to pages depending on status (e.g., the success message for successful emails on my contact page).
Unique Frames
Unique Frames is a program I designed to return only the "unique" frames of a video or image sequence. During this project I learnt about image processing, vectorised operations and SIMD processing, the importance of optimising code, and how to use PySide6 to build object-oriented graphical user interfaces!
In this program, the user uploads a video or folder containing an image sequence, sets a difference-threshold (i.e., the minimum percentage that adjacent frames must differ to be counted as unique), chooses an image comparison method, and then chooses the output format. I designed the program to support multiple comparison methods because I realised that different techniques would be needed to compare different types of input. For example, a pixel-by-pixel comparison would be very effective for video with no noise (e.g., a digital animation where only the character moves) but would be almost useless in comparing noisy video (such as film). Similarly, you need to take a different approach if you want colour or lighting changes to count as unique frames even when the structure of the frames remains the same.
The image comparison methods are: pixel-by-pixel, edge comparison, structural similarity index, histogram comparison, and perceptual hashing. For pixel-by-pixel comparison, each pixel of the adjacent frames are compared, and the percentage of pixels they differ by is output and tested against the user's specified threshold. However, when I first implemented this function it was extremely slow: it took over 19 seconds to compare two images! I knew this wasn't good enough, so I set out to learn how to optimise it — and that was how I learned all about vectorised operations and SIMD processing. By using numpy's vectorised array operations, I got the time down to less than 0.05 seconds! For the edge comparison function, I calculated the Canny edges of the image and compared the percentage overlap of each images' edges to find the percentage difference. However, I had a problem — to accurately get the Canny edges, I needed to specify an upper and lower threshold. These threshold values differ depending on the image, so I knew I couldn't just set a default value — instead, I derived the threshold values by calculating the median gradient magnitude of the image and multiplying it by 0.33 for the lower threshold, and 1.33 for the upper threshold. However, I was using the Sobel operator to calculate the gradient magnitudes, and in order to accurately calculate them, I needed to specify a kernel size! But how do I work out what the appropriate kernel size is?! The answer was: the image variance. By taking the variance of the image, I could derive a suitable kernel size, thus making everything fall into place! The edge comparison function went from detecting no edges for some images and way too many for others, to dynamically and accurately calculating the edges of any image!
In addition to writing the main logic of the program, I also had to make a graphical user interface for it. This brought a whole new set of challenges, and even inspired my next project (see below)! To build the GUI I used PySide6, a Python library that offers access to the Qt framework. Making the GUI was probably more challenging than the program itself, but also was a lot of fun!
PySide6 CustomTitleBar
My next project was building a custom class that allows app developers who are using PySide6 to customise the title bar of their apps! To do this I had to reimplement all the functionality of a normal title bar — the close, maximise and minimise buttons, the ability to drag the app around the screen using, the way the app will slightly "stick" to the sides of the screen before moving past them, and support for a menu bar. In addition, I had to make as much of the design of the title bar easily customisable for the developer. It was an excellent exercise in object-oriented programming and I learnt a lot about the Qt framework!